You Can’t Run Linux Natively on Apple Silicon (Yet)
Native Linux support for Apple Silicon chips is coming. If you can’t wait any longer, you can run Linux right now in a virtual machine.
You can do this for free with a virtual machine (VM) app called UTM. There’s also a paid $9.99 Mac App Store version that you can buy to support developers and gain access to automatic updates through the store interface.
You can use this app to emulate a large number of processor architectures, including x86-64 (“proper” desktop Linux) as well as ARM and PowerPC.
To get started, download UTM and a Linux distribution of your choosing, then get started on creating a virtual machine with UTM.
Note: You can use UTM to run ARM64 versions of Linux at “near native” speeds, while lower performance emulation can be achieved in 32-bit and 64-bit x86 versions. It’s up to you what you choose, but you’ll need to match your version to your system architecture in the instructions below.
Install Ubuntu on an M1 Mac With Apple Silicon
Downloads
- UTM for Mac (v2.0.15 or higher)
- Ubuntu Server for ARM (20.04.1 or higher)
Instructions
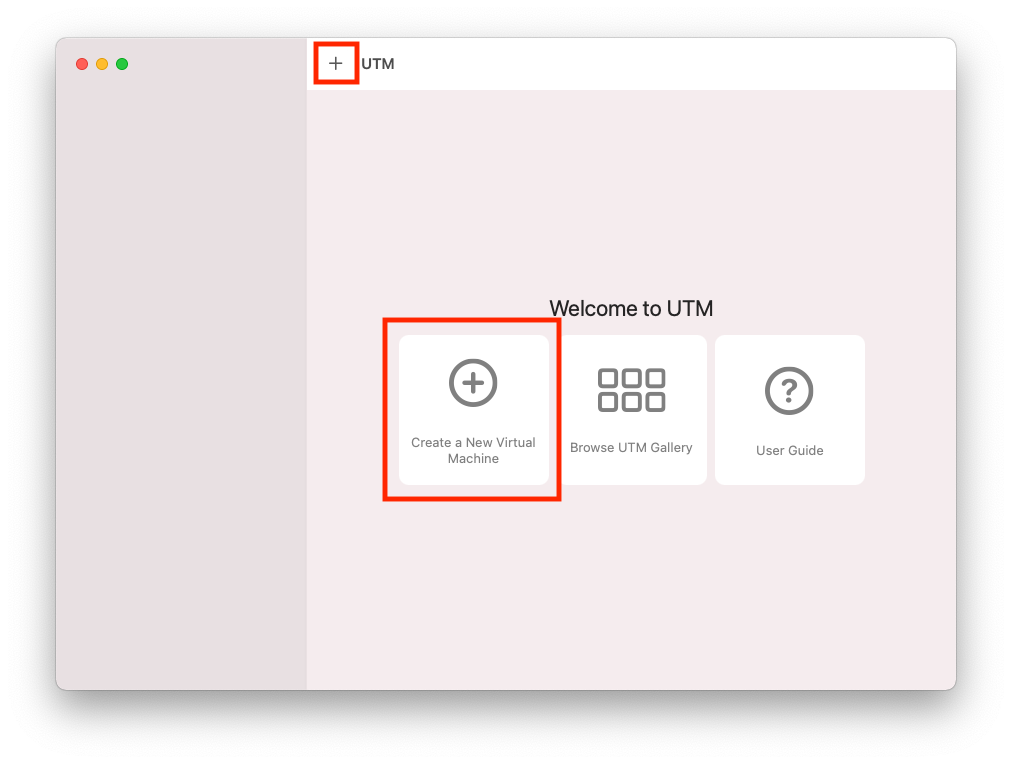
- Open UTM and create a new virtual machine.
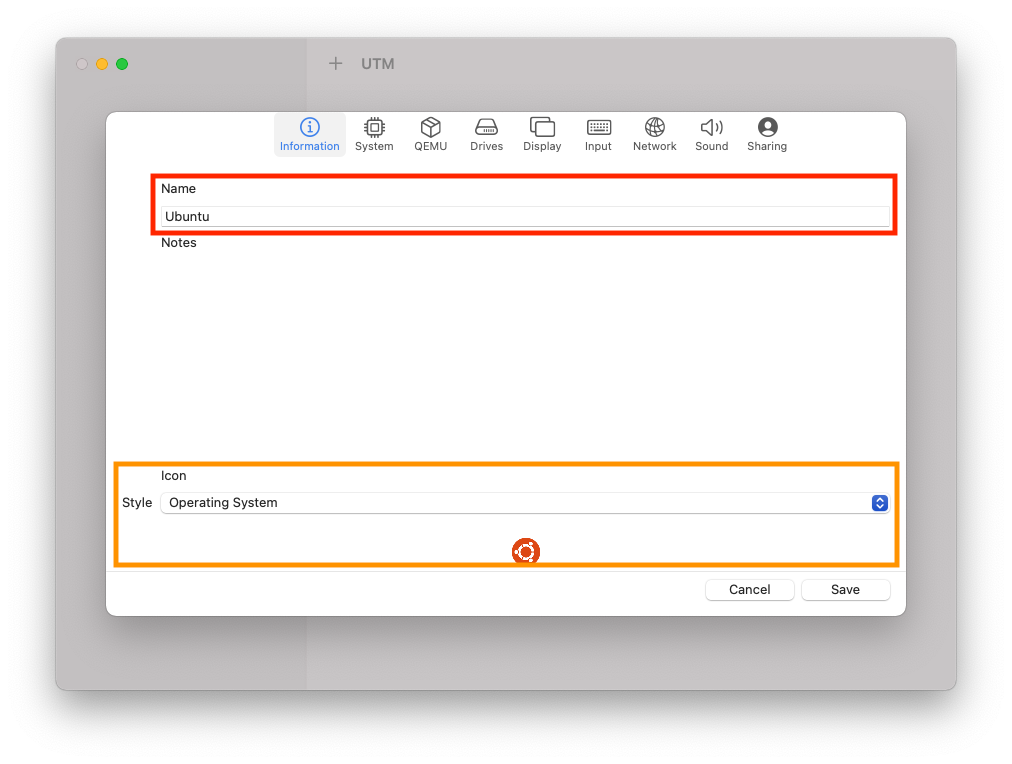
- Give the VM a name and optionally choose an icon.
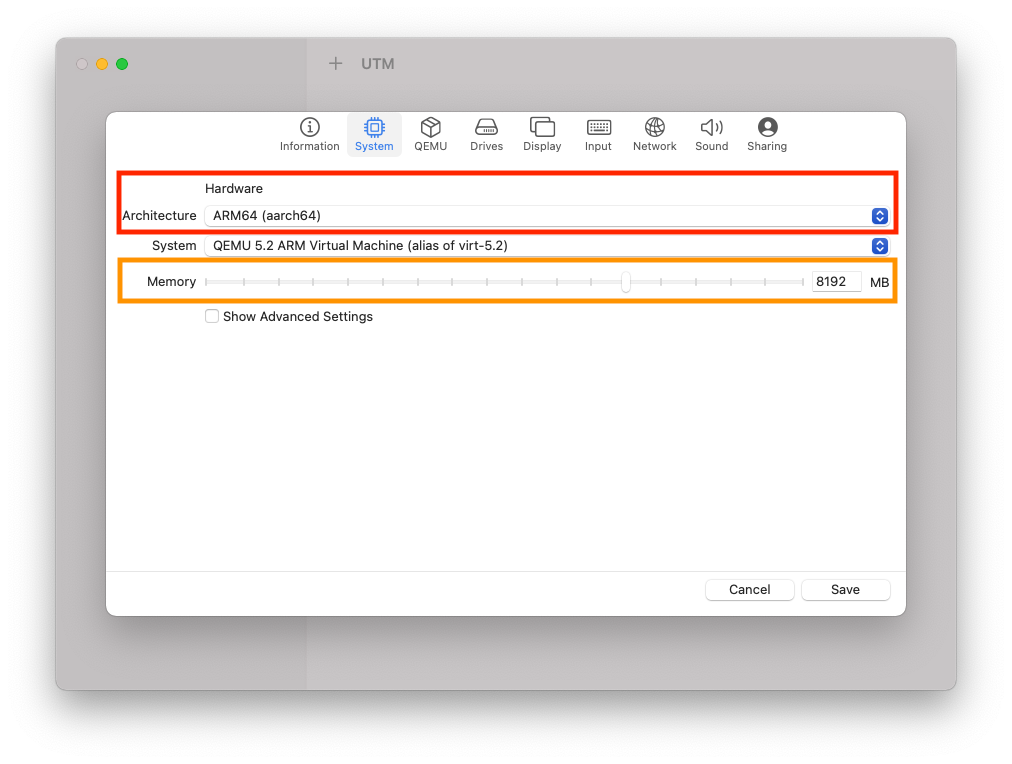
- In System, select the “ARM64 (aarch64)” architecture, and specify the amount of memory. At least half of your computer’s total memory is recommended for performance.
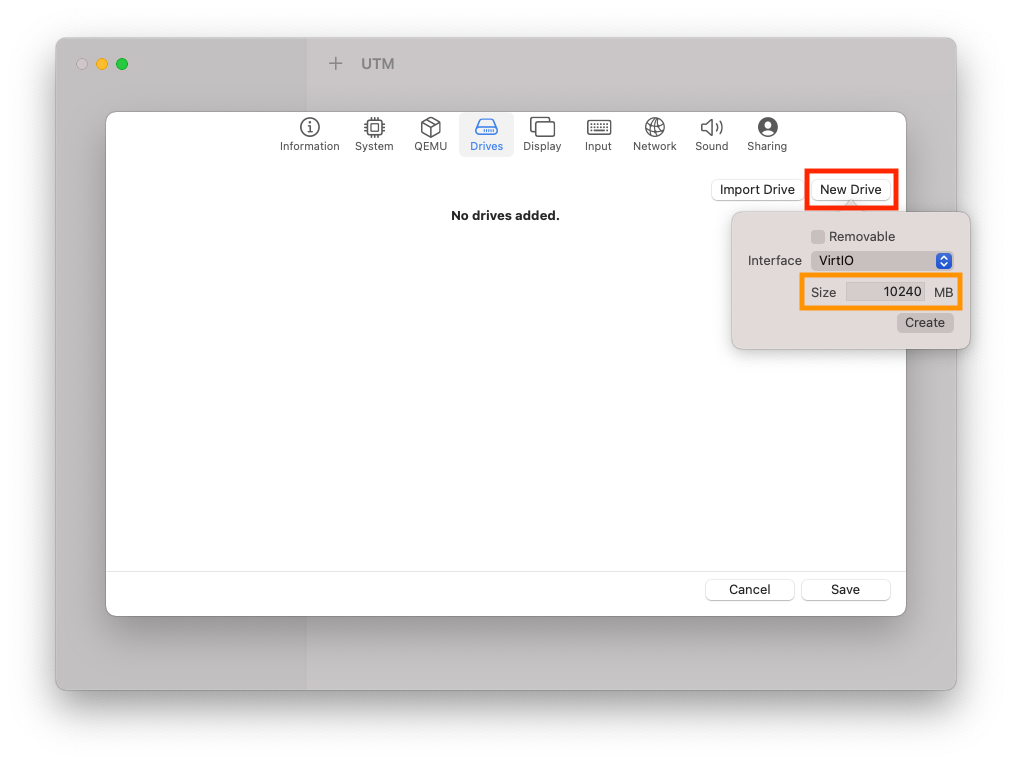
- In Drives, create a new drive. This will be your install drive. It is recommended to give it at least 10,240 MB (10 GB).
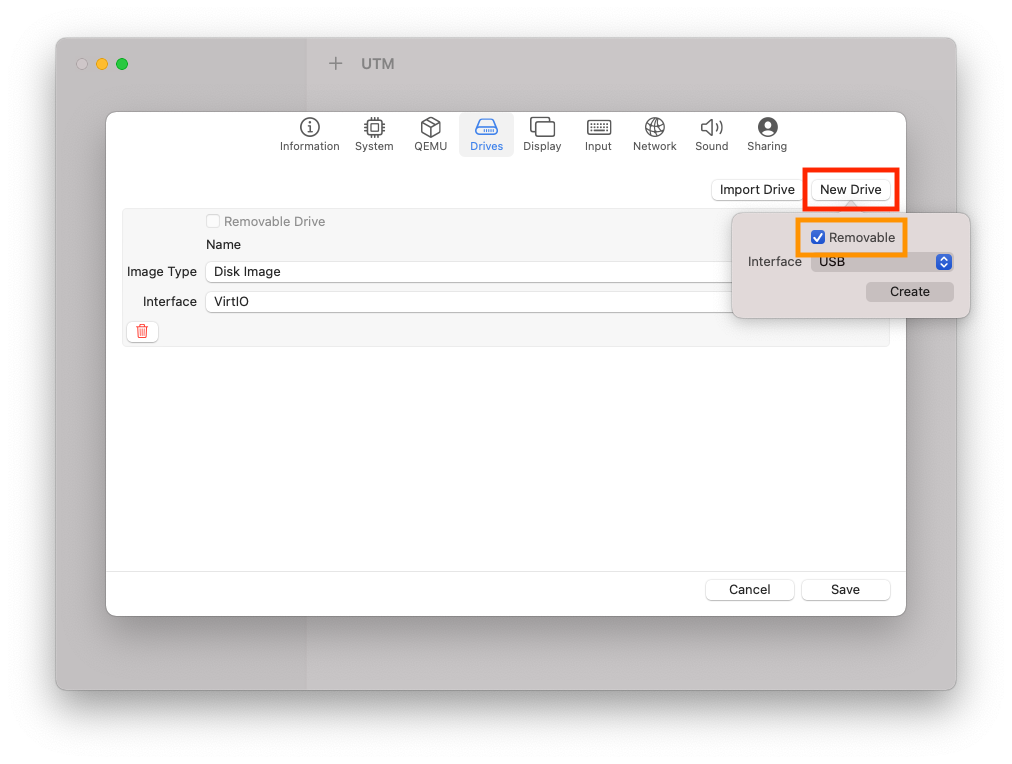
- Create another drive. This will be the installation disk drive. Make sure “removable” is checked.
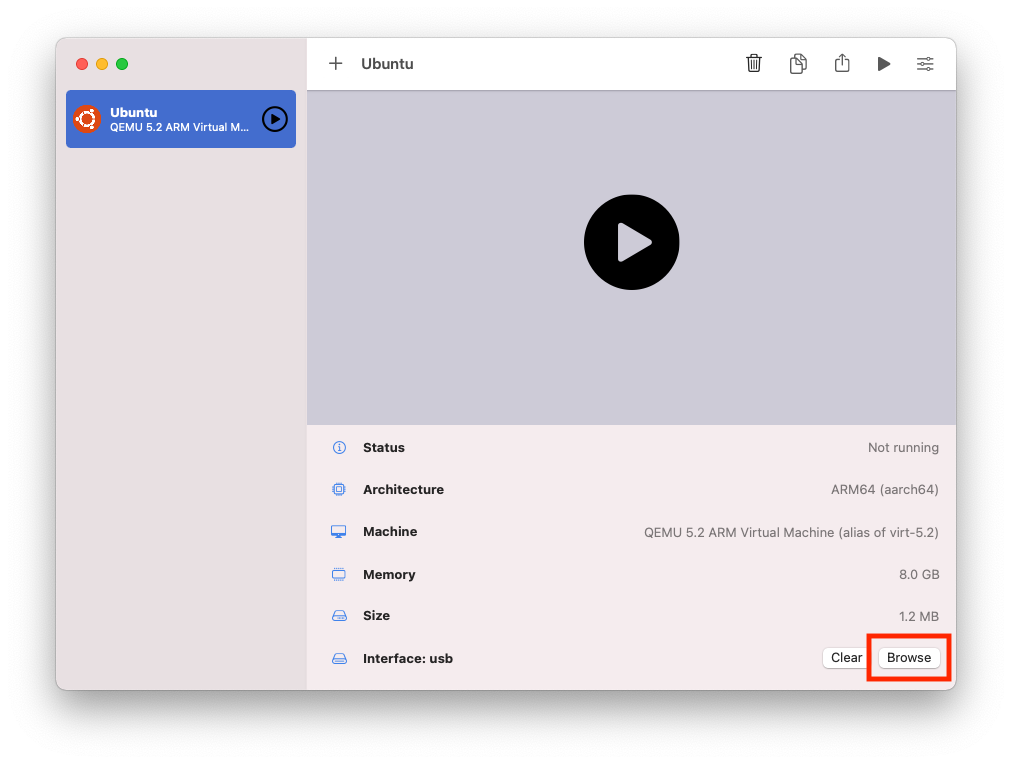
- Save the VM and select it in the sidebar. Click the Browse button on the bottom right and select the Ubuntu installation ISO.
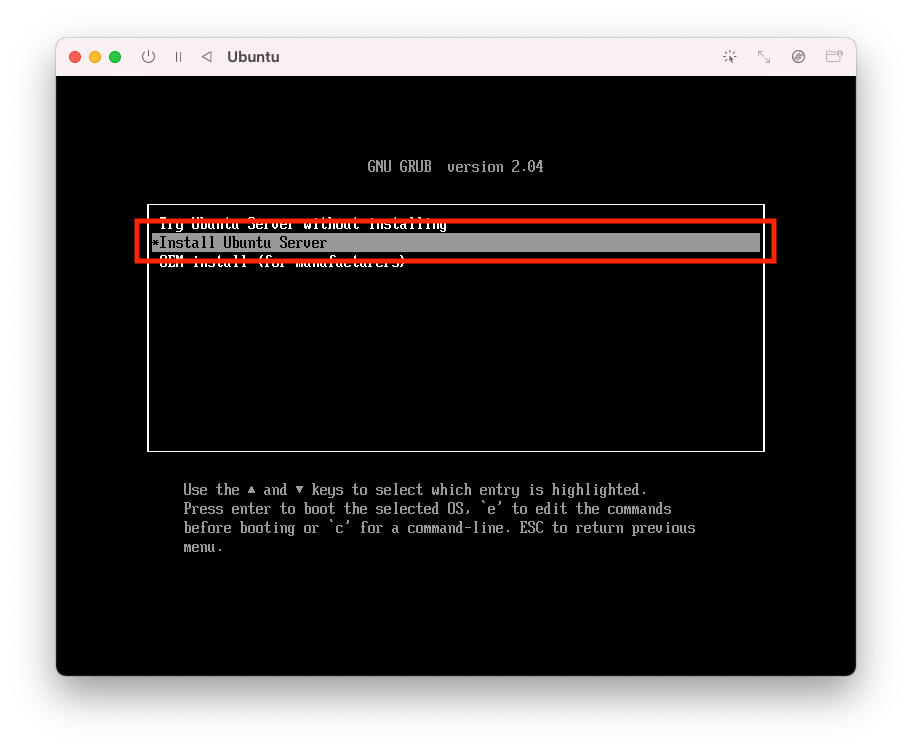
- Start the VM and choose to install Ubuntu server. (If you cannot boot to the installer, go to the troubleshooting section at the bottom.) Follow the installation wizard, all the default options are recommended.
- At the end of the installation, the screen will be black with a blinking cursor. Eject the ISO with the CD icon on the toolbar. Press the restart icon on the toolbar (third from the left) to restart into your installed Ubuntu.
Installing Ubuntu Desktop
At the end of the installation, you will have Ubuntu Server installed without any GUI. To install Ubuntu Desktop, log in and run:
$ sudo apt install tasksel
$ sudo tasksel install ubuntu-desktop
$ sudo reboot
(Note tasksel may fail the first time and you can just run it again.)
Enable clipboard and directory sharing
With the VM turned off, open the settings, and make sure these two options are checked.
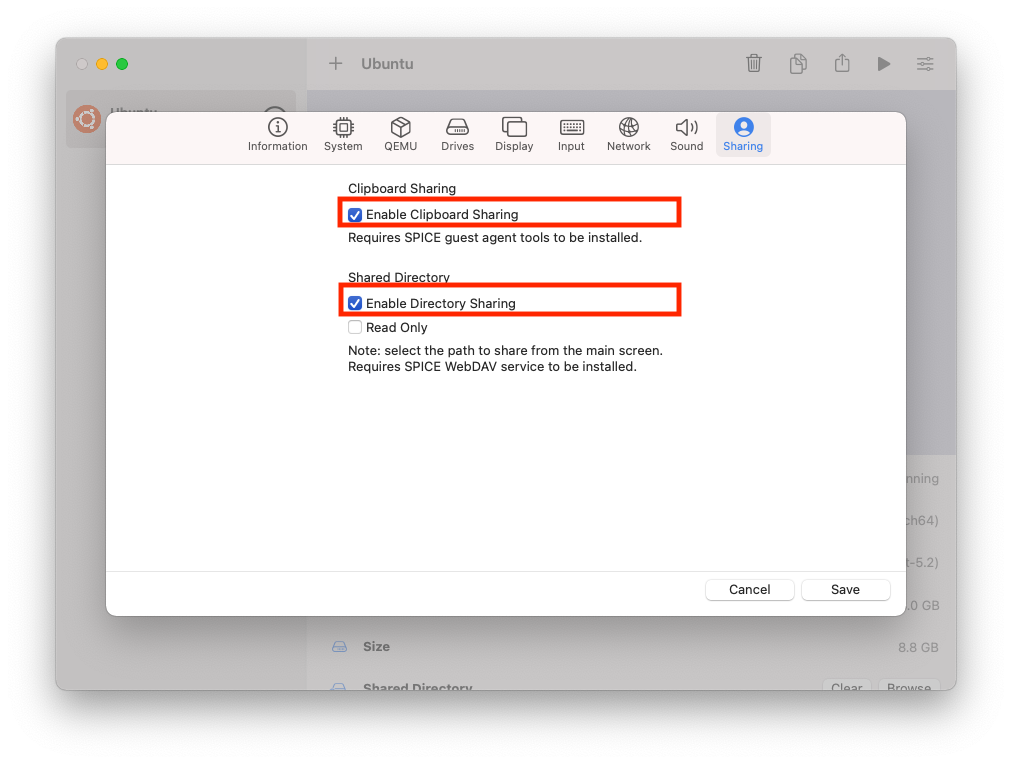
$ sudo apt install spice-vdagent spice-webdavdYour shared directory shows up as a WebDAV server on http://127.0.0.1:9843/. You can use a WebDAV client to access it, or mount.davfs to mount it.
Troubleshooting
Cannot boot into installer
If you start the VM and are stuck at the EFI screen (BdsDxe: failed to load Boot0001 or UEFI Interactive Shell), try the following in order.
- Make sure you have the installer ISO selected. Click the disk icon on the toolbar and check that there is a menu option for
CD/DVD (ISO) Image (usb): ubuntu-xxx.iso. If it saysCD/DVD (ISO) Image (usb): none, then highlight that menu and chooseChangeand then select the ISO. If you don’t have any selectable menu option, follow the guide again and make sure you have added a removable drive. Then restart the VM. - Next, try to get into the EFI Shell. If you see
UEFI Interactive Shellthen you are already in the shell. Otherwise, restart the VM and quickly press the Esc key to enter the shell. - In the EFI shell make sure you see
FS0: Alias(s):CD0h0a0a::BLK1:near the top or something similar. If not, then double check your configuration and make sure you have a removable drive configured and the installer ISO mounted. Also check that your ISO is valid. - Type in:
fs0:\efi\boot\bootaa64.efiand you should see GRUB. Then selectUbuntu Serverto continue with the install.
Networking is unavailable after switching between Console Only and Full Graphics modes
When switching between display modes, the network adapter may be renamed by Ubuntu. To fix this, you need to set up networking again.
- Run
ip link showand look at the last adapter name. For example, it may be listed asenp0s9. - Edit
/etc/netplan/00-installer-config.yamland copy your configuration forenp0s8(or whatever the old adapter was named) and paste it immediately after forenp0s9(or whatever the new adapter is named). - Reboot and you should be able to use networking in both display modes.